
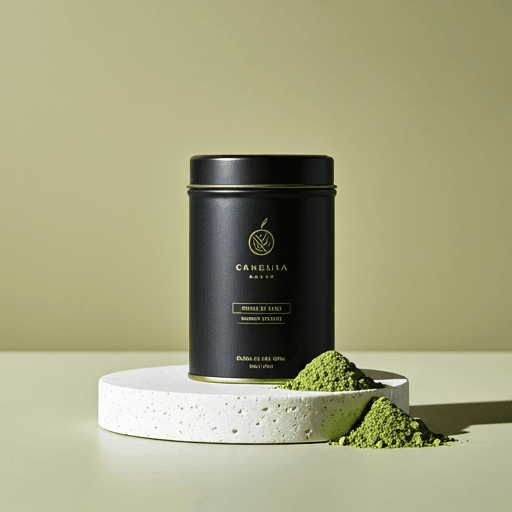
The short answer to how to make your own tea blends: choose one base — a black, green, oolong or white tea, or a caffeine-free base like rooibos — add a small proportion of supporting botanicals such as herbs, spices, dried fruit or flowers, then blend by ratio and taste. A reliable starting point is roughly 70-80 percent base to 20-30 percent everything else, by weight or by loose volume.
That is the whole craft in one sentence. The rest is detail — but the detail is what separates a blend you brew once from one you keep making. This page owns the blending itself: choosing, ratioing, balancing, testing and resting. It deliberately does not re-teach brewing, since leaf per cup, water temperature and steep time by tea type all live in our guide to brewing loose leaf tea; if you are starting further back than that, how to make tea is the place to begin.
How to make your own tea blends: the three-part framework
Almost every blend worth drinking is built from three roles, and understanding them is the spine of tea blending at home. Most home blends fail for one reason: people treat all three roles as equals, throw five things into a jar in similar amounts, and end up with a muddy cup where nothing is legible.
- The base (roughly 70-80 percent). This sets the body, the caffeine and the overall character. It is the voice of the blend. It should dominate. Published guidance varies a little — some blenders let the base run as low as 60 percent or as high as 80 — but a beginner is safest near the top of that range.
- The supporting flavour (roughly 15-25 percent). This is what does the talking — the fruit, spice or herb that gives the blend its name and its personality.
- The accent (roughly 5-10 percent, often less). The top note or perfume: flowers, citrus peel, mint, or a single strong spice. A mild accent can sit near the top of that range; anything genuinely potent belongs at the bottom of it or below, measured in pinches rather than spoonfuls.
Professional blenders often express this as parts rather than percentages — think roughly eight parts base to two parts support and one part accent, which lands almost exactly on 73 / 18 / 9. Either way, the lesson is the same. One clear lead, one supporting voice, one whisper. If you can taste every ingredient equally, you have made a muddle rather than a blend.
Choosing your base
The base decides more than flavour. It decides how forgiving your blend will be, whether it has caffeine, and which partners it can survive. A robust base can carry assertive spice; a delicate one is bullied by almost anything.
| Base | What it brings | Good partners | Watch out for |
|---|---|---|---|
| Black | Malty, robust, brisk; has caffeine and holds up to spice and to milk | Citrus peel, cinnamon, clove, dried berries, vanilla | It will flatten delicate florals — do not waste them here |
| Green | Grassy, fresh, delicate; has caffeine | Jasmine, lemongrass, mint, light citrus | Easily bullied; heavy spice buries it completely |
| Oolong | Floral and creamy, often with a stone-fruit note; has caffeine | Dried peach or apricot, rose, osmanthus, vanilla | It is already complex — add little, or you hide what drew you to it |
| White | Whisper-soft and subtle; has caffeine, usually gently | Almost nothing — a few petals at most | The most easily overwhelmed base of all |
| Rooibos | Naturally sweet, woody, smooth; caffeine-free | Vanilla, apple, orange peel, warm spice — it takes nearly anything | Very forgiving, which makes it the best base to learn on |
| Herbal base (chamomile, peppermint) | Caffeine-free; a tisane rather than true tea | Each other, ginger, a little licorice root | Strong mints will dominate whatever you pair them with |
A note on wording, since it trips people up: only leaves from the tea plant are true tea, and everything else is technically a tisane — the full explanation is in what is herbal tea. It matters practically, because a blend is only caffeine-free if every component is. Put a spoonful of black tea into a chamomile blend and you no longer have a caffeine-free jar.
Balancing: the rules that actually decide success
These are the practical rules that separate a repeatable blend from a lucky accident.
- Blend by weight. A small kitchen scale is the one piece of gear that changes everything. A tablespoon of feathery chamomile and a tablespoon of dense ginger root are wildly different amounts of plant, so volume measurements drift from batch to batch. Weight is how you make the same blend twice. Loose volume is fine for a first experiment; it stops being fine the moment you want to repeat one.
- Match particle size. This is the rule most beginners have never heard, and it quietly ruins jars. Mix a fine-cut herb with whole leaf and the fine cut sinks while the whole leaf rides on top, so your first scoop and your last scoop are different blends. Worse, fine particles tend to extract faster and can turn bitter while the whole leaf is still opening. Cut everything to a roughly similar size, or at minimum stir the jar before every scoop.
- Match steep time. Pair a delicate green that wants a short steep with a woody root that needs a long one, and one of them is always wrong — you either get thin root or stewed, bitter leaf. Group ingredients that brew alike. The actual temperatures and times are the brewing guide's job; what matters for blending is simply that they agree.
- Go tiny on strong aromatics. Mint, licorice, star anise, clove, lavender and hibiscus take over fast. Lavender in particular tends to slide from floral to soapy with startling speed, and hibiscus brings sharp acidity and a red stain along with its flavour. Add a pinch, taste, then adjust upward — you cannot take it back out.
- Everything must be bone dry. Blend only thoroughly dried ingredients. Even slightly damp fruit will introduce moisture, and moisture can mould the entire jar — not just the fruit. Fresh herbs are lovely brewed on the spot, but they do not belong in a blend you intend to keep.
- Count your ingredients. Three or four components make a legible cup. Seven rarely do. When a blend is not working, removing something is more often the fix than adding something.
The method: test small, write it down, scale up
Learning how to make tea blends is mostly a matter of disciplined iteration, so blend by the tablespoon, not by the jar. The point of a test batch is that a failure costs you a spoonful instead of a month's tea.
- Taste your components separately first. Brew a small cup of each ingredient on its own — the tea, but also the rose petals, the orange peel, the dried apple. You cannot balance flavours you have never met, and a surprising number of botanicals taste nothing like they smell.
- Mix a test batch by the tablespoon. Enough for one or two cups is plenty. Start at roughly 70-80 percent base and go light on the accent.
- Write the ratio down before you brew it. Do this first, not afterwards. A blend you cannot reproduce is only ever a lucky accident — and your mistakes are worth recording too, because the note that says "too much clove" is what stops you doing it again.
- Brew a cup and taste it honestly. Ask what is missing and what is shouting. "Muddy" usually means the accent is too big, or that you have simply used too many ingredients.
- Adjust one variable at a time. Change the accent, or the support, or the base — never all three at once. Change one, brew again, note the result. This is slow, and it is the only thing that reliably works.
- Scale up once you like it, and not before. Multiply the recorded ratio, weigh it out, and jar it. Now you have a blend rather than a memory.
Five starter blends to work from
Use these as scaffolding rather than scripture. They are deliberately simple, and they are sized as test batches — adjust them to your own palate.
| Blend | Base (~70-80%) | Supporting | Accent | Notes |
|---|---|---|---|---|
| Orange and clove black | 4 tbsp black tea | 1 tbsp dried orange peel | 2-3 cloves, lightly cracked | Robust and warming; takes milk well |
| Vanilla apple rooibos | 4 tbsp rooibos | 1 tbsp dried apple pieces | Half a vanilla pod, chopped | Caffeine-free and very forgiving — the best first blend |
| Jasmine green | 4 tbsp green tea | 1 tsp lemongrass | 1 tsp jasmine flowers | A delicate base wants an even lighter hand than the framework suggests; keep the steep short so the green stays sweet |
| Peach and rose oolong | 4 tbsp oolong | 1 tbsp dried peach | 1 tsp rose petals | Rose turns soapy fast — start under a teaspoon |
| Mint and chamomile | 2 tbsp peppermint + 2 tbsp chamomile | — | A pinch of licorice root | The exception: two co-bases, caffeine-free, no true tea |
That last blend deliberately breaks the 70-80 percent rule, which is a useful thing to see early: the framework is a tool, not a law. Two compatible herbs can share the lead when both want the same steep — as peppermint and chamomile happily do.
Resting the blend
This is the step nearly everyone skips. Once blended, seal the jar and leave it alone for a few days — three to five is a reasonable window — before judging it properly. Aromatic oils migrate and settle across the other ingredients, and the blend tends to read as more integrated, less like a pile of separate things sitting together. Something slightly disjointed on day one is often noticeably rounder by day four. Taste a cup on blending day and another after resting, simply to learn what the rest is doing. Resting also explains a common frustration: a blend judged and rejected within an hour of mixing may never have been given the chance to become itself.
Storing your blend
Store your blend airtight, opaque, cool and dry, away from light and away from other strong smells — tea is absorbent, which is exactly why a jar kept beside the spice rack starts tasting of the spice rack. Label every jar with the ratio and the date, because in three months you will remember neither.
Blends are best while they are still aromatic. As a rough guide, expect roughly 6-12 months before a flavoured blend fades, with delicate green, white and floral components drifting sooner and robust black or rooibos bases — and spice-heavy blends, whose essential oils are more stable — holding on longer. Fading is a quality issue rather than a safety one — a stale blend is dull, not dangerous — but a jar that smells musty, looks clumped, or shows any sign of moisture should be discarded rather than brewed. The full deep dive on keeping leaf fresh lives in how to store loose leaf tea.
A note on botanicals and safety
Use food-grade culinary botanicals from a food source. That means ingredients sold for eating and drinking — never ornamental flowers from a florist or garden center, never roadside pickings, and never anything you cannot confidently identify. Ornamental blooms are routinely treated with things that are not meant to end up in a cup.
A few honest caveats. Some popular botanicals are not for everyone — licorice root in quantity is the common example, and people vary in how they get on with it, so treat it as an occasional flavouring rather than a daily habit and check with a qualified professional if you have any reason for concern. If your blend contains true tea then it contains caffeine, so a "herbal" jar is only caffeine-free if you have actually checked every component. Dried fruit and rooibos bring their own sweetness, so most blends need no sugar at all; if you do sweeten with honey, note that honey should never be given to infants under 12 months. Watch for tree nuts, a common allergen, if you are adding nut pieces or serving to guests, and check the label on any plant milk you pour in. None of this is a health guide, and no blend here is a remedy for anything — responses vary from person to person, and this is not medical advice.
The bottom line
Choose one base and let it lead. Add a supporting flavour that complements rather than competes, and an accent measured in pinches. Weigh it, match the particle size and the steep, keep it bone dry, test it by the tablespoon, and write the ratio down. Rest it a few days, jar it airtight, label it — then change one thing and do it again. That iteration is not the overhead of diy tea blends. It is the hobby.