A WDT tool is a small handle fitted with several very fine needles that you stir gently through the dry coffee grounds in your portafilter, right before you tamp. That raking motion is the Weiss Distribution Technique, and it breaks up clumps and static-bound lumps so the coffee bed sits even and fluffy. The result is espresso that extracts more uniformly and channels far less, which is why a WDT tool has become one of the cheapest, most reliable upgrades to a home espresso routine.
If you have ever pulled two shots from the same dose and grind and watched one run pale and fast while the next chokes to a slow drip, uneven grounds are usually the reason. A few seconds of raking evens things out before hot water ever touches the puck.
What a WDT tool is, and where the name comes from
The letters stand for the Weiss Distribution Technique, named after John Weiss, a home-espresso enthusiast who described the method on a coffee forum in the mid-2000s. His idea was simple: instead of tapping or banging the portafilter to settle the grounds, stir the bed with thin needles so the whole dose is loosened and redistributed from the bottom up.
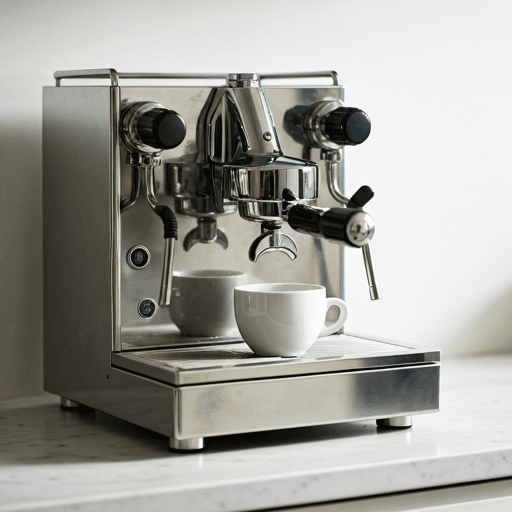
A modern espresso distribution tool is that idea turned into a tidy gadget. Most are a weighted handle or a puck-shaped disc holding anywhere from three to a dozen or more needles, each roughly 0.3 to 0.4 mm thick, about the gauge of an acupuncture needle. You lower the needles into the dosed basket, swirl or rake them through the grounds, lift them out, level the surface, and tamp as usual. The tool never touches the espresso itself; it only conditions the dry grounds beforehand.
What it is not
A WDT tool is not a tamper, and it is not a spinning "leveler" or palm distributor. Those tools press or skim the top of the puck to flatten the surface, but they do nothing about clumps hidden deeper in the bed. The needles, by contrast, work through the full depth of the grounds. Think of the WDT step as preparing the coffee and the tamp as the final compression; the two do different jobs. For the pressing side of the equation, see our coffee tamper guide, and for the shot itself, our walkthrough on how to make espresso at home.
Why the WDT tool helps
Espresso is ground very fine, close to the texture of powdered sugar. Fine particles love to clump, and freshly ground coffee often carries a static charge that makes lumps cling together and stick to the sides of the basket. When you dose that coffee into a portafilter, it rarely lands as an even layer. You get denser patches, looser patches, small craters, and little boulders of stuck-together grounds.
That unevenness matters because water is lazy. Under around nine bars of pressure it seeks the path of least resistance, so it rushes through the loose, low-density areas and barely wets the dense ones. This is called channeling. The fast channels over-extract and turn bitter and hollow, while the under-wet zones stay sour and weak, and both problems arrive in the same cup at once. Raking with a WDT tool breaks the clumps apart, redistributes the fines, and leaves a uniform bed so water has to move through the whole puck at one steady rate.
| Problem in the puck | What causes it | How the WDT tool helps |
|---|---|---|
| Clumps of grounds | Static cling and grinder "chunking" of fine coffee | Needles slice clumps into loose, individual particles |
| Channeling | Water finding low-resistance gaps in an uneven bed | An even bed removes the preferential fast paths |
| Mounding or craters | Grounds falling unevenly from the grinder chute | Raking spreads coffee flat and level across the basket |
| Sour and bitter at once | Some zones over-extract while others under-extract | A uniform bed extracts at a single, consistent rate |
| Static "spider legs" | Fine or light-roast grinding building a charge | Stirring de-clumps and settles the fluffed pile |
You can often see the payoff through a bare, spout-less portafilter: a well-distributed puck pours as a single, glossy, mouse-tail stream instead of squirting from several angles. If you want to understand that diagnostic view, our explainer on the bottomless portafilter covers what those spray patterns are telling you.
How to use a WDT tool
The technique takes only a few seconds once it becomes muscle memory. A gentle, patient stir beats an aggressive one every time.
- Dose into the basket. Grind and add your coffee as usual, so the grounds sit in the portafilter ready to distribute.
- Insert the needles. Lower the tool so the needles reach most of the way to the bottom of the bed without scraping the metal basket.
- Stir gently. Move in small circles or a slow zig-zag, working around the outer edge and then through the middle. The goal is to fluff and mix, not to compact or gouge.
- Keep it brief. A handful of light passes is plenty. Over-stirring can pack fines toward the bottom and actually slow extraction.
- Lift, level, and tamp. Draw the needles straight up, settle the surface flat, and tamp with even, level pressure to finish the puck.
Everything upstream still matters just as much. A consistent grind is what gives the needles an even starting point to work with, so dialing in the grinder is a separate job worth getting right first. And because distribution is only one link in the chain, it helps to keep the whole picture in view, from espresso as the base of every coffee through dose, grind, and pressure.
What to look for in a WDT tool
Tools vary more than you might expect, and the differences change how they feel in the hand. There are no ranked "best" picks here, only the traits worth weighing.
- Needle gauge. Finer needles (around 0.3 mm) slip between particles and disturb the bed less; slightly thicker ones (0.4 mm and up) are sturdier but move more coffee. Very fine needles are the usual recommendation for delicate distribution.
- Needle count. More needles cover the basket in fewer passes but can drag if you rush; fewer needles are more forgiving for a slow, deliberate stir. Both work.
- Depth stop or adjustable length. A collar that sets how deep the needles reach keeps you from scraping the basket and helps you repeat the same motion every time.
- A stand or dock. A weighted base or magnetic holder keeps the needles from bending and off the counter between shots, which matters because bent needles are the main way these tools fail.
- Basket fit. The needle spread should match your basket diameter so the edges of the bed actually get stirred, not just the center.
The DIY route
Because the tool is so simple, many people build their own. The classic homemade version is a wine cork with a few acupuncture needles or fine sewing pins pushed into one end, trimmed to an even length. It is not pretty, but it distributes grounds every bit as well as a machined tool, which is a fair reminder that the technique, not the gadget, does the work.
When the WDT tool matters most
Distribution is not equally important for every setup. It earns its keep most when your coffee is prone to clumping and static in the first place.
Light-roast beans are denser and grind into finer, more static-prone particles, so they clump readily and benefit a lot from raking. Single-dosing grinders, which grind one shot's worth of beans at a time, also tend to produce more clumps and retention quirks, making WDT close to essential for consistent shots. Naked or high-extraction workflows, and any coffee ground very fine, respond visibly too.
At the other end, forgiving darker roasts carry a bit more oil, clump less, and are more tolerant of an imperfect bed, so the difference is smaller, though rarely zero. If your shots already pour evenly and taste balanced, WDT is a refinement rather than a rescue. If they gush, spray, or swing wildly from cup to cup, it is often the single change that steadies everything down.
None of this replaces good grinding, dosing, and tamping; it complements them. Distribution simply makes sure the coffee you worked to prepare is spread evenly enough for water to treat it fairly. For the cost of a handful of needles and a cork, that is a remarkably good trade, and it is the reason the WDT tool has quietly moved from forum curiosity to standard kit on so many home espresso benches.