
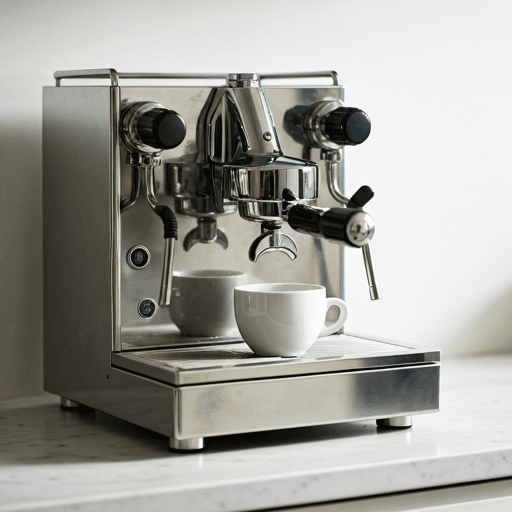
Coffee roaster preheating is the part of the roast that happens before any coffee goes in — you are saturating the machine's steel with heat, not simply driving a number up a display. Doing it inconsistently, or not at all, is the single most common reason a first batch of the day behaves nothing like the rest of the production run.
The mental shift that makes preheating click is this: the roaster holds far more energy than the coffee does. A drum, its faceplate, the shaft, the housing and the ducting are all thermal mass, and they can be at very different temperatures while the probe reads exactly the same number. Two roasts can start at an identical charge temperature and behave completely differently, because the stored energy sitting behind that number is not the same. Everything else in this article follows from that one fact.
What coffee roaster preheating actually does
Preheating has two jobs, and they are not the same job. The first is to store energy in the machine. The second is to distribute it evenly, so the drum wall, the front face and the exhaust path are all carrying roughly the heat you expect them to carry.
Only the first job is visible on your display. A burner running at a fixed setting will push the air inside the chamber toward target relatively quickly, and the bean probe — sitting in that air, in an empty or nearly empty drum — will follow it. The steel lags behind, sometimes badly. The mass has to be heated by conduction and radiation from the inside surfaces outward, and metal does that on its own schedule regardless of how impatient the roaster is.
That is why a preheat is described as a heat soak: you are not aiming at a temperature so much as soaking a large lump of metal until the gradient across it flattens out. The word "soak" is doing real work there.
A terminology note worth flagging, because it trips people up: some roasting literature uses "the soak" to mean a different technique entirely — charging with low or no gas and then raising the burner within the first minutes of the roast. That is a post-charge gas strategy, not a preheat. When someone says "soak," check which one they mean.
Why the probe reaches target long before the steel does
Your bean probe is not measuring your drum. With an empty or nearly empty drum it is mostly reading the environmental air temperature inside the chamber, plus whatever radiant heat reaches the sheath. Air has almost no thermal mass; it responds in seconds. Heavy steel and cast iron respond on the order of tens of minutes.
So the sequence during a preheat is roughly:
- The early climb. Air temperature rises fast. The probe reports "ready." The drum wall is still cool in the middle and cooler still at the ends.
- The soak period. The probe reading barely changes — which is exactly why impatient roasters cut it short — while heat migrates into and through the metal. Very little visible progress, most of the actual work.
- Approaching equilibrium. The gap between what different sensors report narrows and stops moving. Practitioners commonly use the spread between bean and exhaust readings as a rough proxy: when the two stop converging, the machine has largely stopped absorbing.
Published guidance on how long this takes varies enormously, and the sources genuinely disagree. Suggested figures for professional drum machines are commonly given anywhere from roughly a quarter of an hour at the short end to the better part of an hour for the largest capacities, while small sample and home machines are often described as needing only a few minutes. Treat every one of those numbers as a description of somebody else's machine. Preheat times and preheat temperatures do not transfer between roasters — not between manufacturers, not between capacities, and often not between two units of the same model with different burner tuning, insulation or exhaust routing. The principles transfer. The numbers do not.
The reason the spread is so wide is structural: how much metal a machine carries relative to its batch capacity, and how much of its heat is delivered by conduction versus convection, changes the answer completely. Machine architecture is its own subject — see coffee roaster machines for how drum, fluid-bed and hybrid designs differ — but the short version is that a heavy conductive drum generally needs a long soak and a light convective machine needs much less.
Soak time versus soak temperature
Most roasters standardize their target temperature and let the time float. That is backwards, or at least incomplete. Temperature tells you where the surface is. Time tells you how deep the heat has gone.
Two common preheat approaches exist, and both can work:
- Idle to target. Hold the burner at a fixed setting, climb to the charge temperature, then hold — idle — for a defined period before charging. Simple, slow, very repeatable.
- Overshoot and settle. Deliberately drive the machine above the intended charge temperature, then back the burner off and let it fall to target. The overshoot pushes more energy into the mass; the settle period lets the surface come back down. Also repeatable, but it demands discipline about how far above and how long the settle lasts.
Whichever you use, the operative rule is that the hold is not dead time. If you cut the hold short because the number already looks right, you have changed the roast even though your log will show an identical charge temperature. This is the single most common invisible variable in a roastery.
The first batch of the day, and the sacrificial batch
Ask experienced roasters about the first batch of the day and you will hear the same thing: it runs differently. It is typically slower to develop, needs more applied heat, drops later, and reads lighter than the same profile run an hour later. The machine is, in effect, taking energy from the coffee to finish heating itself.
That is where the sacrificial batch comes from. Also called a ghost batch, cleaning batch or throwaway batch, it takes two broad forms:
- A genuine sacrificial roast — a small charge of cheap or already-roasted coffee run purely to finish loading the machine with heat and to season the drum after cleaning. The output is not sold.
- A ghost or dry run — no coffee at all. You run the machine through a charge-to-drop cycle's worth of time and burner settings, so the thermal history matches a real batch, then charge for real.
Both are legitimate. Both are also, at least partly, a workaround: a long enough, well-standardized heat soak reduces how much a sacrificial batch is doing for you. Some roasteries eliminate the practice entirely once their preheat routine is long enough; others keep it permanently because it doubles as a sanity check that probes, burners and airflow are reading the way they read yesterday. If you keep it, keep it identical every day — a sacrificial batch that varies in size, coffee and duration is just another uncontrolled variable dressed up as a control.
At a glance: under-preheated, soaked, over-preheated
| Signal | Under-preheated | Properly heat-soaked | Over-preheated |
|---|---|---|---|
| Charge reading | On target (misleading) | On target | On target (misleading) |
| Stored energy behind it | Too little | As intended | Too much |
| Turning point | Tends to sit lower and later than usual | Where your reference roast puts it | Tends to sit higher and earlier |
| Early rate of rise | Weak, slow to build | Smooth climb, then a controlled decline | Spikes, then crashes |
| Drying phase | Drags; risk of a baked, flat start | Predictable duration | Rushed; moisture driven off too aggressively |
| Typical bean damage | None visible — the damage is flavor | None | Scorching (face marks), tipping (charred edges) |
| In the cup | Dull, papery, muted sweetness | Clean and repeatable | Ashy, harsh, a roasty edge over origin character |
| First fix to try | Longer soak before charging | Change nothing | Shorter soak, lower idle setting, or a longer settle |
The relationship between stored energy and where the curve bottoms out belongs to another page — see coffee turning point for charge temperature and the turning point itself. What matters here is the diagnostic use: if your turning point moves while your charge temperature did not, your preheat changed.
Over-preheating: scorching, tipping and a crashed early curve
More heat is not better. Push the soak too far and the drum surface can get hot enough to mark beans on contact. Scorching shows as dark patches on the flat face of the bean, generally understood as a conduction problem. Tipping shows as charred spots at the bean's tips and edges, commonly attributed to too much heat applied early in the roast, forcing moisture out through the bean's germ end too violently.
Be careful with the causal story here, because the roasting community does not fully agree on it. Charge temperature is widely blamed for both defects, and there is a long-running counter-argument that charge temperature alone is not the culprit — that batch size, drum speed, burner setting in the first minutes and how much residual energy the machine is carrying matter at least as much. The honest summary: excess stored energy at charge makes both defects more likely, but it is one input among several, and diagnosing them by charge temperature alone will send you chasing the wrong variable.
The other over-preheat symptom is curve-shaped rather than visual. Too much stored energy tends to produce a steep early climb followed by a crash as the beans absorb faster than the machine can resupply, which is exactly the shape you spend the rest of the roast fighting. That behavior and how to read it live on coffee rate of rise.
Under-preheating: the stalled, baked opening
The opposite failure is quieter and easier to miss. With too little stored energy, the machine spends the first minutes recovering rather than roasting. The turning point sits low, the climb out of it is sluggish, and the drying phase stretches. Roasters then compensate with more gas mid-roast, which produces a curve that looks acceptable on paper but tastes hollow — the classic baked, flat, papery cup with sweetness that never arrives.
The tell is that the correction is always reactive. If you find yourself adding heat in the first third of every morning's first roast and never in the afternoon's, that is not a coffee problem or a profile problem. That is a preheat problem.
Between-batch recovery is the same physics in miniature
Once production is running, every gap between roasts is a miniature preheat. The machine has just given a large slug of energy to a batch of coffee, and it has to reload before the next charge. Roasters call this the between-batch protocol, and it deserves the same discipline as the morning routine.
Two things move in opposite directions:
- Depletion. Each batch removes energy from the drum. Charge too soon and you are effectively under-preheated again.
- Accumulation. Over a long run, the housing and ducting keep gaining heat. Charge at the same displayed temperature and the machine underneath is progressively hotter — the metal that was cool relative to the air on batch one can end up hotter than the air later in the run. Late batches drift toward the over-preheated column of the table above.
The standard countermeasure is a fixed protocol rather than a fixed temperature: a defined recovery window, a defined burner and airflow setting during it, and ideally a rule that the machine must fall below charge temperature and come back up rather than simply be caught on the way down. Coming back up from below tends to produce a far more repeatable energy state than intercepting a falling curve, because a falling reading tells you nothing about which direction the metal underneath is heading.
Back-to-back roasting also interacts with load. Changing charge weight changes how much energy the coffee will pull out of the machine, so a protocol tuned for one weight will not hold at another — that scaling question is covered in coffee batch size.
Building a preheat routine you can repeat
The goal is not the perfect preheat. It is the same preheat, so that when a roast changes you know it was the coffee or the profile and not the machine. A workable routine has five parts:
- A fixed start. Same burner setting, same airflow, same drum speed, from a cold machine, every day. Write it down.
- A fixed climb. Either idle to target or overshoot-and-settle — pick one and never mix them. If you overshoot, define both how far above target you go and how long the settle lasts.
- A fixed soak. A hold at target, timed with a clock rather than judged by eye. Establish its length empirically: extend it until adding more time stops changing the turning point and early curve of a test batch. That length is your machine's answer, and it is only your machine's answer.
- A stability check. Watch the spread between your sensors rather than any single reading. When the spread stops narrowing, the machine has largely stopped absorbing. This is a better readiness signal than one probe hitting a number.
- A logged first batch. Record whether batch one still deviates. If it does, your soak is short. If it stops deviating, you have found the routine — and you may find the sacrificial batch has quietly become unnecessary.
Also standardize the conditions around the machine as far as you reasonably can. Ambient temperature, humidity, exhaust back-pressure and how recently the roaster was cleaned all change how a preheat behaves. You cannot control the weather, but you can note it, so that an odd morning has an explanation rather than a mystery.
The bottom line
Preheating is not a warm-up formality; it is the act of loading the machine with the energy your profile assumes is already there. Because the display reports air, not steel, the charge temperature can be perfectly correct while the stored energy behind it is not — which is why soak time matters as much as soak temperature, why the first batch of the day misbehaves, and why between-batch recovery follows the same logic on a shorter clock. Fix the routine before you touch the profile. Every figure you have read here or anywhere else is machine-dependent; the only preheat numbers worth trusting are the ones you established on your own roaster and can repeat tomorrow.